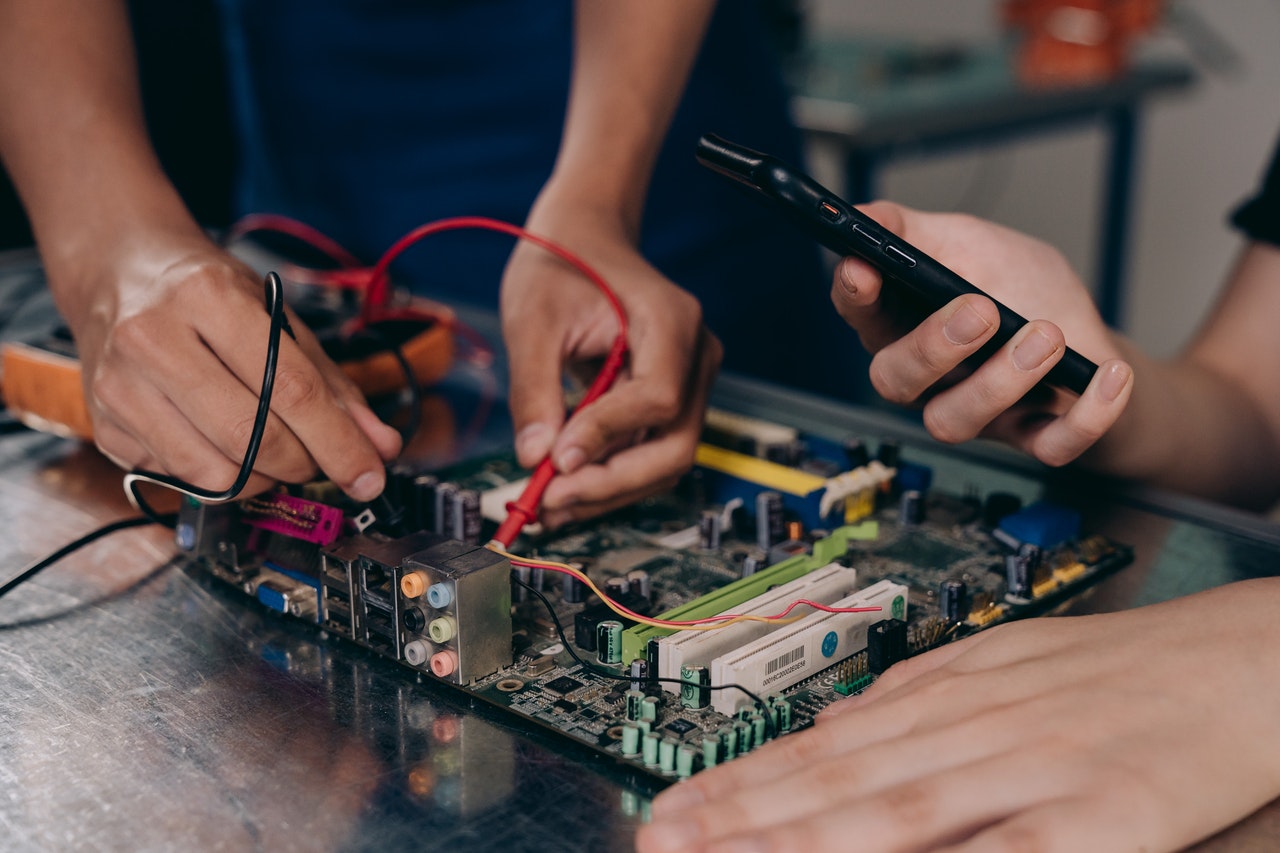
The motherboard, also identified as the mainboard, is circuitry that forms the computer’s major hub. It controls every activity from sending data to the monitor to starting your computer.
Replacing the motherboard is very possible without even interfering with other components. However, this is a risky step that requires computer technical skills. Nevertheless, it will be much cheaper to repair or replace the motherboard than buy a budget laptop. We will take you through systematic steps on how you can successfully replace the motherboard.
How to replace motherboard on your laptop
The steps below will assist you with replacing the motherboard but it surely won’t be an easy task for you. It requires patience and keenness since it will take a better part of your day and some of your energy.Replacing a motherboard will require taking apart your laptop; this is not an easy choice especially if your computer skills are low.
Therefore, before taking any action, carry out intensive research on computer parts and make sure you have a vivid mental picture of how they look like and the way they are assembled on the laptop. Secondly, suppose you were running Windows, back up all your data, and capture information on how to reactivate the window due to the hardware change that will happen.
Step 1: Shut down your laptop
Step 2: Detach your laptop from the power
If you were using your laptop while plugged in, unplug the power cable for safety purposes.
Step 3: Remove the expansion cards.
Overturn your laptop to access the back cover, slide open the expansion card and take it apart completely.
Step 4: Unscrew the fasteners and lift the bottom cover
Five fasteners are fixed to the back cover, Use a T5 bit screwdriver to unscrew them all. Turn the laptop over and get a hold of the back cover. Gently pull it out and lift it off the motherboard at 120 degrees. Do not apply too much force while pulling the input cover since it is still attached to the mainboard through some cables.
Related: How to Fix Overheating Laptop Without Taking it Apart
Step 5: Discount the touchpad cable and unplug the laptop’s battery
Insert your fingers into the loop and by applying some force, pull the touchpad cable upward to disconnect it. Once you have disconnected the cable, remove the input cover completely. Carefully, proceed to remove the battery. Slide the battery connector out without bending the pins or twisting the connector. Grip the battery and slide it from the socket downwards.
Step 6: Disconnect the speaker, audio board cable module, display, and webcam from the motherboard.
To disconnect the speaker cable, use your fingers to pull it away straight from the mainboard. For the audio flex cable, use your fingernail or Spurger end of a screwdriver to flip up the black latch and slide the cable out gently from the connector. At the top left side, use the pull tab to disconnect the display cable by pulling it upward. Take a black pull tab and directly pull the webcam cable upwards to disconnect it.
Step 7: Remove the WIFI module, memory, storage, and fasteners from the motherboard.
Using a framework screwdriver, remove the black and white WIFI cables by lifting them out from the rubber holders. Proceed to unscrew the silver bracket connecting the WIFI module and remove it gently. The memory is held by metal clips, remove it by pulling it up and down the metal clip using your fingers. This will force the memory to pop up at an angle. The storage is attached using a fastener, remove it by unscrewing the fastener and in a straight motion slide it out.
Step 8: remove the motherboard
Begin by unscrewing the fasteners holding the mainboard, then grab the motherboard from the bottom edges and gently lift it. Handle the motherboard with care since below it lays sensitive components.
Step 9: Replace your old motherboard with the new mainboard
Begin by aligning the two pins found at the bottom cover with the holes at the motherboard. Make sure all the external cables are not stuck in between since you will reconnect them afterward to their respective sockets. Using a T5 screwdriver, fasten the motherboard properly to its position.
Step 10: Reassemble all the disconnected parts as they were initially
Before interfering with anything, it is advisable you take a picture of the connection of the internal parts of your laptop. This will make it simpler to reconnect all parts. Ensure you plug in every cable you disconnected to its respective port in the reverse order.
Related: How to charge laptop battery without a laptop
Disadvantages of replacing the motherboard on the laptop
- It is difficult to be sure of where to start when it comes to reassembling the laptop since they are very complicated
- Complexity; there are many screws and cables involved with the motherboard, of which it can be challenging to grasp how to fix them.
- It needs you to be very cautious otherwise, a single mistake can cost you a lot since the parts are very fragile.
- Problems associated with second-hand motherboards are unnoticeable hence not a suitable substitute while purchasing a new one is very expensive.
- The entire process is very costly, time-consuming, and requires technical skills.
Conclusion
Replacing a motherboard is not impossible but without good computer skills, just visit an expert for help. It is one task that you cannot bear to mess up.