

Choosing among the best document cameras starts with a teaching question: what should learners see, discuss or make together? A device can support live modelling, close examination, annotation or a shared demonstration. Begin by describing that moment, then compare equipment against it. You can also review the available document cameras as one part of the decision.
The useful comparison is not a race for the longest feature list. It is a check that the camera fits the room, the lesson movement and the material being shown. A clear decision record keeps attention on the work learners must do, the view they need and the way the teacher will change that view.
Before comparing models, write down the moments when a shared image would help. Include explanation, observation, student contribution and practical demonstration where they belong in the lesson. The same classroom may need several of these moments, but they do not all place the same demand on equipment. A question-led brief gives each feature a job and leaves unsupported promises out of the discussion.
Document cameras: compare the working setup
A practical comparison considers how the image will be used. Teachers may need to show a page, a small object, a handwritten solution or a process performed by hand. Look at the viewing area, the position of the lens, controls that can be reached while teaching and the path from camera to display. These questions keep the decision tied to classroom work rather than isolated specifications.
The same device can feel simple in a demonstration and awkward in a busy lesson. Compare the moments between views as carefully as the views themselves. If a teacher must stop speaking, cross the room or rebuild the setup for every change, the apparent feature range may not translate into useful instruction. A decision record should therefore describe the action, the required view and the learner response. That record makes later comparison clearer and keeps attractive but irrelevant features in perspective.
A useful trial follows the rhythm of an actual explanation. Place the material, bring the relevant detail into view, ask a question, change the material or angle, and return to the group. Note which actions are easy to repeat and which interrupt attention. The record need not rank every option. It simply shows whether the equipment supports the intended teaching sequence.
Use these questions while comparing options:
- Match the viewing area to the objects and pages learners will examine.
- Check whether controls support quick changes while the lesson continues.
- Consider where the device can sit without blocking the teacher’s working space.
document cameras for schools: a shared framework
Schools often need one choice to serve more than one subject and more than one room. List the recurring tasks first: modelling a method, sharing student work, examining detail and making a process visible. Then separate essential conditions from conveniences. This makes it easier to compare options consistently across classrooms without pretending that one checklist suits every lesson.
A cross-school decision also benefits from shared language. Ask each teacher to describe the object, the audience and the transition the camera must support. One classroom may prioritize a page held flat, while another may focus on a small artifact or a practical demonstration. The comparison remains fair when each request is translated into an observable classroom action. It also gives the school a useful basis for discussing training, storage and responsibility without claiming features that have not been checked.
Include the people who will support the equipment after purchase. Ask the IT team to check the proposed connection against the actual classroom display and computer, rather than assuming a connector in a photograph proves compatibility. If software is involved, establish how it will be installed and who can change its settings. A camera that travels between rooms also needs a named storage place and a way to keep its necessary cables together. These practical arrangements belong in the purchasing brief alongside the teaching requirements.
Ask suppliers to separate the equipment price from any accessories or services proposed with it. Confirm what is included, what the school already owns, and what would need a separate purchase. Keep written answers to questions about warranty terms, support and replacement parts; do not infer those terms from a general product description. This gives the purchasing team a basis for comparing the complete proposed arrangements, not just the headline prices.
- List recurring classroom tasks before comparing equipment.
- Separate essential viewing and control needs from conveniences.
- Test the same written routine in each room that may use the camera.
classroom document cameras: lesson conditions
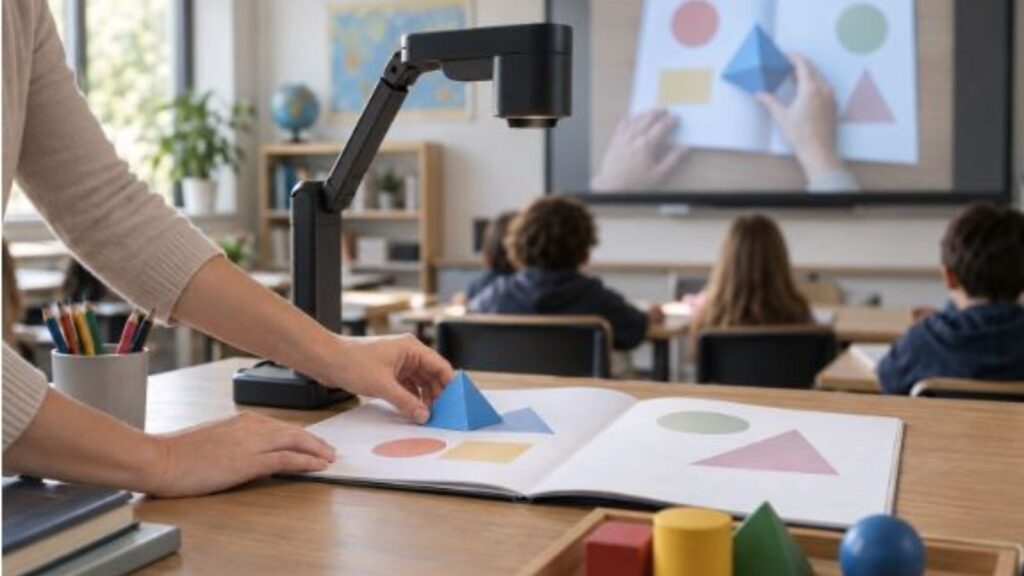
The classroom context changes the priority. A camera used during discussion should let the teacher move between explanation and the displayed object without a complicated pause. A camera used for close observation needs a stable view and enough flexibility for the chosen material. Test the sequence of a real lesson on paper: place the object, show it, change the view, invite a response, and return to instruction.
Try the sequence with the people who will use it, not only with a technical checklist. A teacher can note whether the displayed material stays central while questions are asked, whether learners can identify the relevant detail and whether the next activity can begin without a long reset. These observations do not rank every model for every school. For classroom document cameras, this is also a chance to check visibility from the back and sides of the room. Ask someone to sit in those positions while a teacher displays ordinary handwriting, rather than judging the image only from beside the screen.
The room itself belongs in the test. Consider the teacher’s position, the display that learners watch and the material that has to move during the explanation. Then repeat the sequence after changing one condition, such as a different page or object. The point is to discover which parts of the lesson are stable and which need a deliberate adjustment.
digital document cameras: putting the view to work
Digital document cameras are most useful when the displayed view becomes part of the lesson rather than a separate demonstration. Decide how learners will respond to what they see and what the teacher must control at the same time. The final choice should be the one whose operation supports that plan with the fewest interruptions.
A short trial using representative classroom materials can reveal more than a generic feature ranking. Record the task, the necessary adjustments and the point at which learners need to see detail. That record gives the school a defensible basis for comparing equipment.
When comparing digital document cameras, separate live display from any proposed recording or image-saving functions. They are different requirements, and the school should confirm which functions a particular model and software combination actually provides. If a saved image could contain a pupil’s name or work, agree how identifying details will be kept out of the frame and where approved files would be stored. A live demonstration does not require the school to create a permanent copy of everything shown. Choose that workflow deliberately rather than discovering it after installation.
Before placing the order, separate confirmed results from unanswered questions. A successful trial in one room is evidence for that setup, not proof that every classroom will behave identically. Where a requirement remains untested, request the missing demonstration or written clarification before treating it as satisfied. The person approving the purchase should be able to see both the reasons for the choice and its remaining limitations.
Use the final record to keep four points together: the teaching task, the material, the required view and the learner response. That short record makes a later comparison easier to revisit and keeps the choice connected to the work the camera is expected to support.
- Name the lesson task before discussing a feature.
- Record the view learners need and the response it should support.